
15 Class Manager V2.0.4
Intro
The Class Manager is added since AT version 1.3.
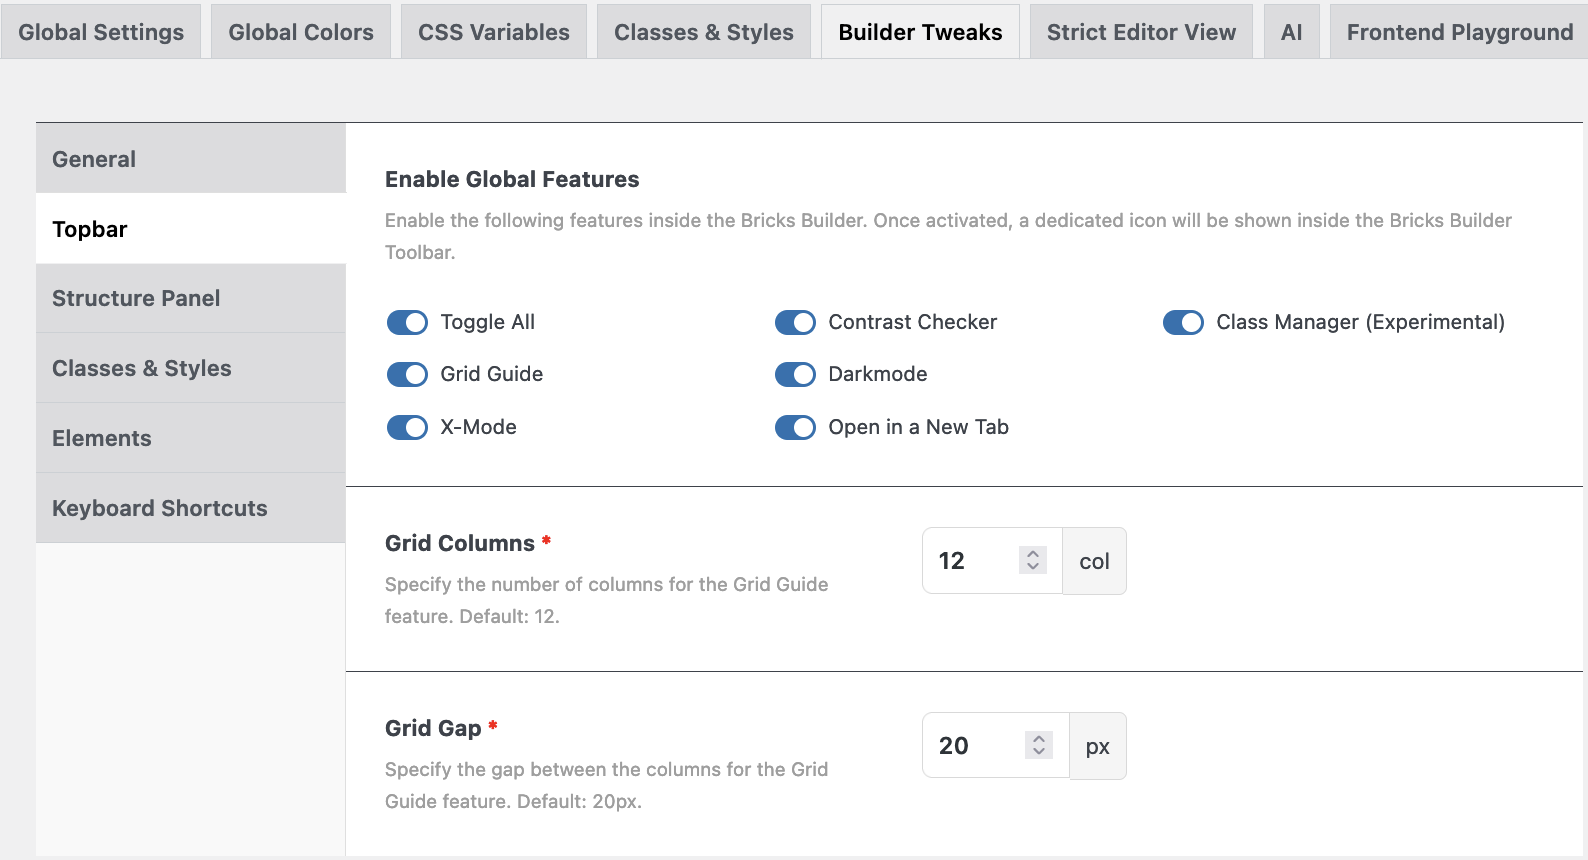
The Class Manager can be found at: Bricks – AT settings – Builder Tweaks – Top Bar – Class Manager.
Once enabled and settings saved, you can find a new icon in the left Topbar.
As soon as you click on the icon a new modal will open.
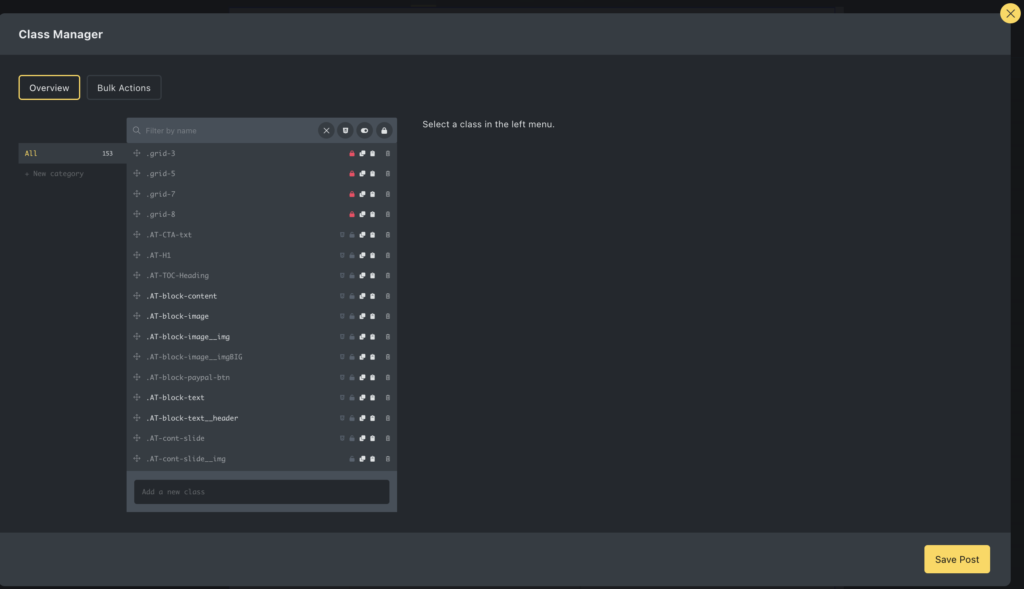
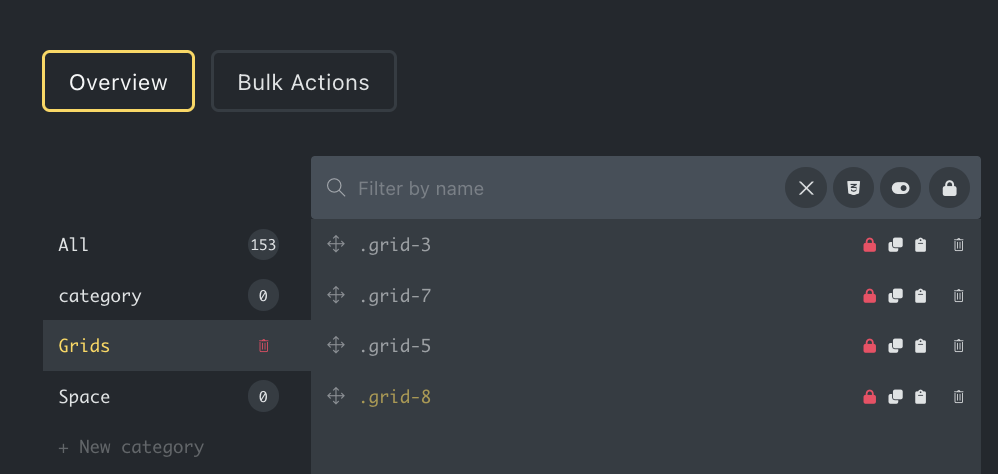
In the second left column, you see a list of global classes that exist on this website, a search field, and some possibilities to filter.
New in this version is also that on the left there is a column that shows categories, with which classes can be grouped, and a new button on top called ‘Bulk Actions’.
More about that later.
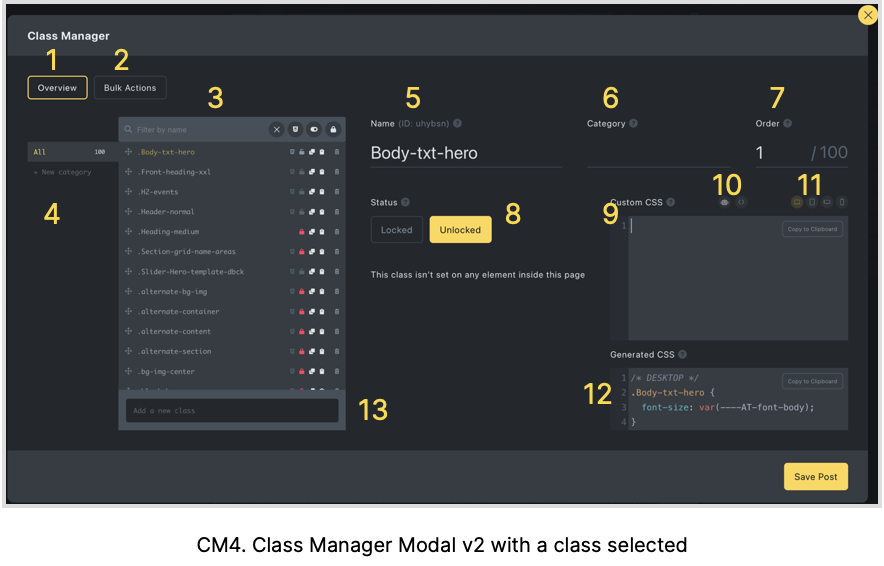
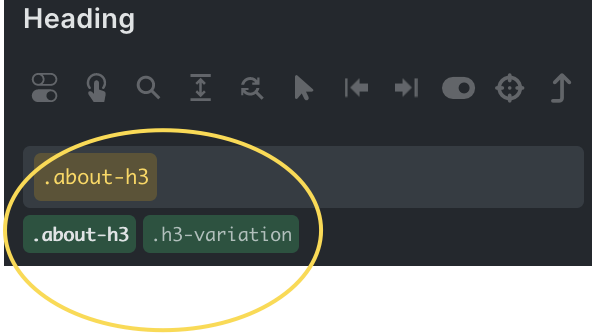
Click a class 1
As soon as you click a class the modal transforms into an information panel.
- Overview
- Bulk Actions: this is a chapter in itself. More specific information below.
- Class Manager List. The list of Classes. Each class has 3 or 4 icons. Lock/unlock, duplicate, or delete. When there is an icon in front of the “red lock” it means it has Styles assigned to it.
- Categories. From now on you can create specific categories to group your classes in a neat way. To create a category put your cursor in the text field and give it a name. Immediately a new field will show, “Assign with AI”. This only works when you have an OpenAI account. But you can also create a category from the workspace.
- Name of class. You can see the Bricks generated ID of the class and can change the name to anything you like better or more meaningful.
- Name of category: Whatever category you see, you can change the name on the fly.
Click a class 2
7. Order: You can see that this class is number 1 in a total list of 100 classes. The order can be changed either by typing a different number or dragging the class to a different place.
NB! The order cannot be changed when one of the filters is active!
8. Un-/Lock button: Here you can change the lock status of any class, OR by clicking the red lock icon behind the Class in the list. Below it we can see whether this class has been used on an element. By clicking on the element name you go straight to that element, otherwise, you’ll see “This class isn’t set on any element on this page.”
9. Custom CSS window: We can also apply custom CSS from within the Class Manager. Any CSS applied here can also be found in the CSS of that element in the workspace. You can also make a choice between the different breakpoints to apply different CSS (6). From here you can also copy the custom CSS to the Clipboard if necessary.
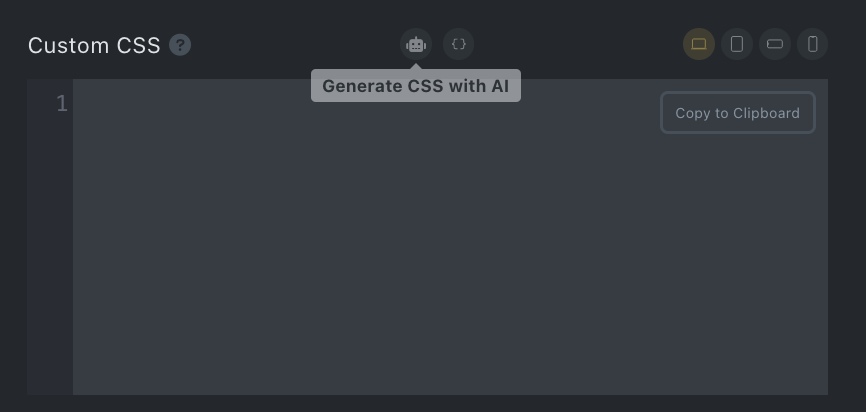
10. Generate CSS with AI / Insert %root% {}: On top of the CSS window you’ll see two icons. With the first one you can generate CSS with AI, but you need to have an account, otherwise, you’ll see this…
![]()
11. Breakpoints: These are the different breakpoints. Click one to make breakpoint-specific changes.
12. Generated CSS: This field shows all the automatic and manually generated CSS for this specific element per breakpoint.
13. Create a new class: Here you can create a completely new class on the fly.
Remarks:
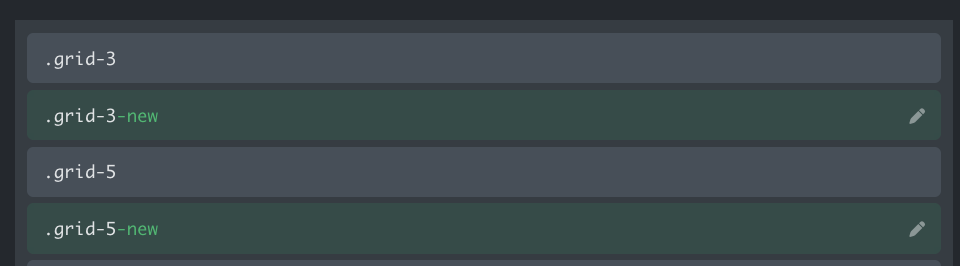
– When a Class is duplicated it will have the same name with the extension ‘-new’, and when you duplicate it again it will have the addition of ‘-new-new’.
At the bottom of the Class list, you’ll find a field where you can create a new class, which will automatically be placed at the bottom of the list.
You can also delete a class, but contrary to Bricks this is a one-step action. One click on ‘Delete’ means the Class is gone. However, if you did do this by accident, don’t click the save button, just reload the page and the deleted classes are back. Another way is to use ‘Undo’ in Bricks Builder. Then the Classes will also be restored.
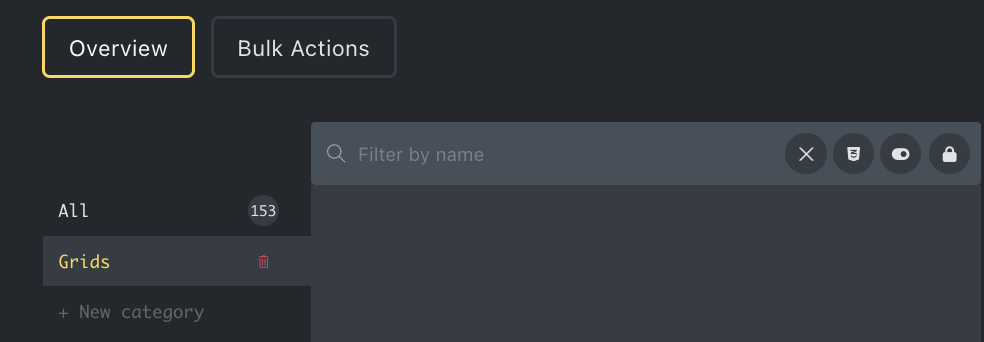
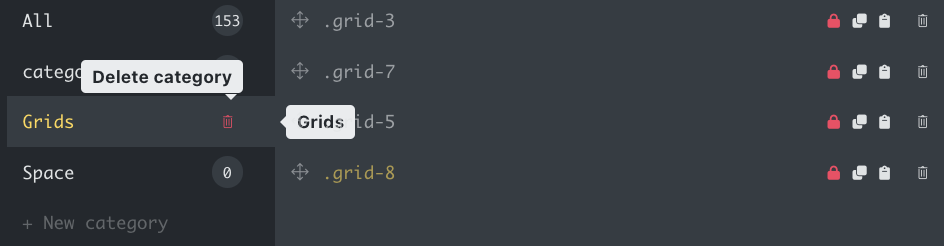
Categories
To create a new category, just put the cursor in the text field and type a name. In this case I chose ‘Grids’ for obvious reasons.
Perhaps a bug, but when you type a name divided by a space, e.g. Space Ships, it will create two different categories, namely ‘Space’ and ‘Ships’.
Once you created a category you can now drag and drop your classes in it. Or type the category name in field 6 (Category) followed by RETURN.
Categories
So, I created a category ‘Grids’ and drag and dropped my Grid Classes into it or I typed in the name in the Categories field on the right.
On the right side of the text field you can now see a red bin.
One click on it and it will disappear. Except for the text balloon, no second warning, nada. Gone.
However, there are no consequences for the assigned classes, these still exist with the ‘all’ category.

Generate CSS with AI
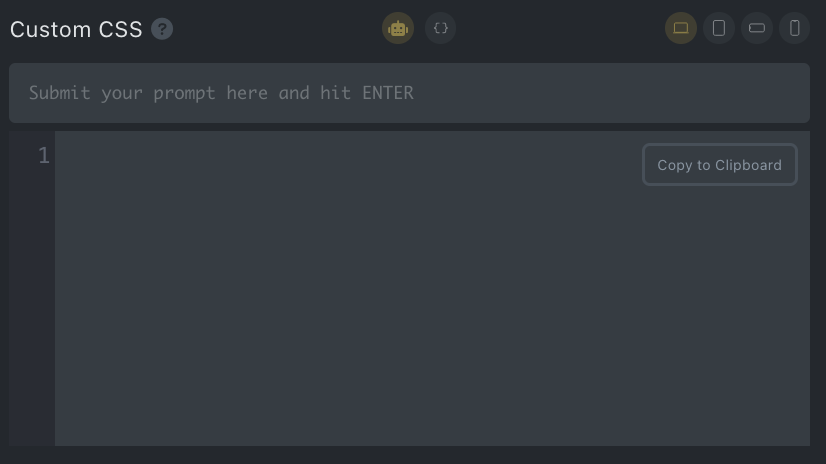
As soon as you select a class WITHOUT a red lock or UNLOCK a class, two new buttons appear at the Custom CSS field.
With the first one you can ‘Generate CSS with AI’ and with the other one ‘Insert %root% {}‘.
However, you have to activate your AI account otherwise it won’t work, and you’ll see the message below.
![]()
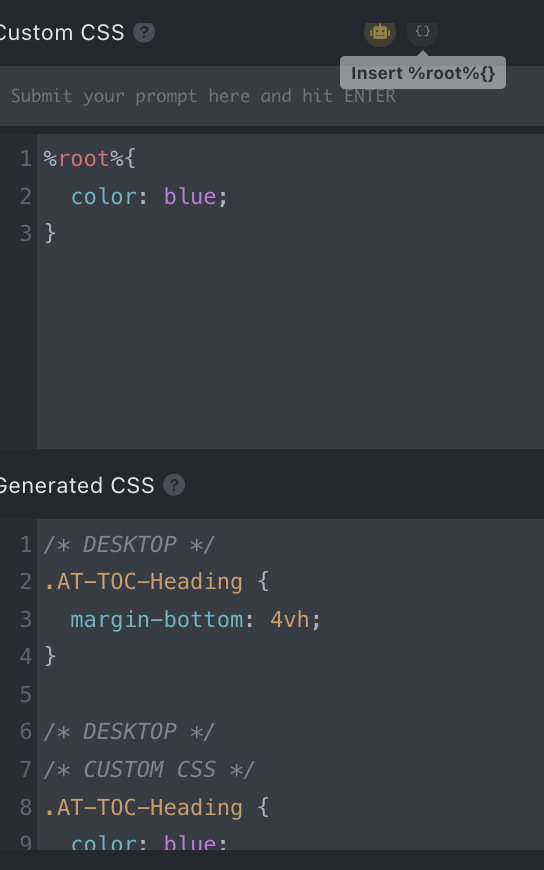
Generate CSS with "Insert %root% {}"
When we select the icon ‘Insert %root% {}‘, we can write our custom CSS in the field beneath.
The code will be immediately translated and transferred to the field ‘Generated CSS’.
The CSS can be applied to different breakpoints as well. See the 4 breakpoint icons at the top right.
The biggest change however is the “Bulk Action”.

Overview Bulk Actions
Let’s start with an overview of the Bulk Actions Screen
- List of Classes
- Rename Classes with some similarities, see example below.
- Duplicate Classes with some similarities
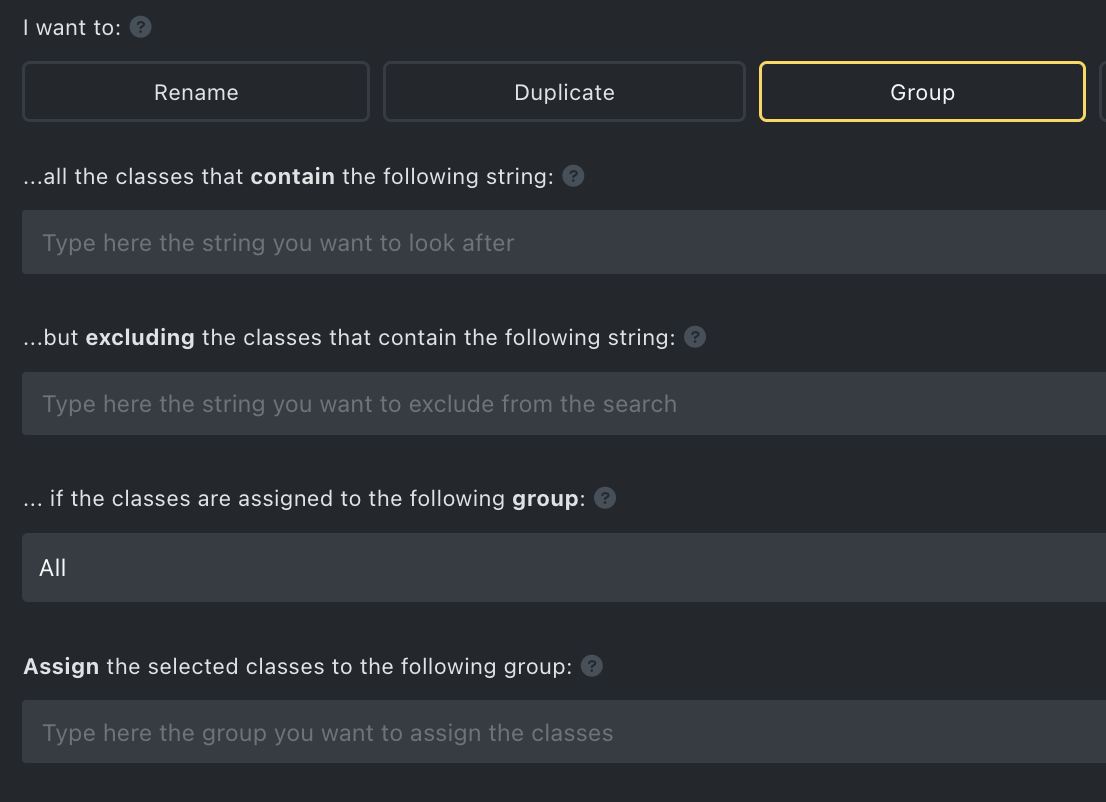
- Group Classes with the same similarities
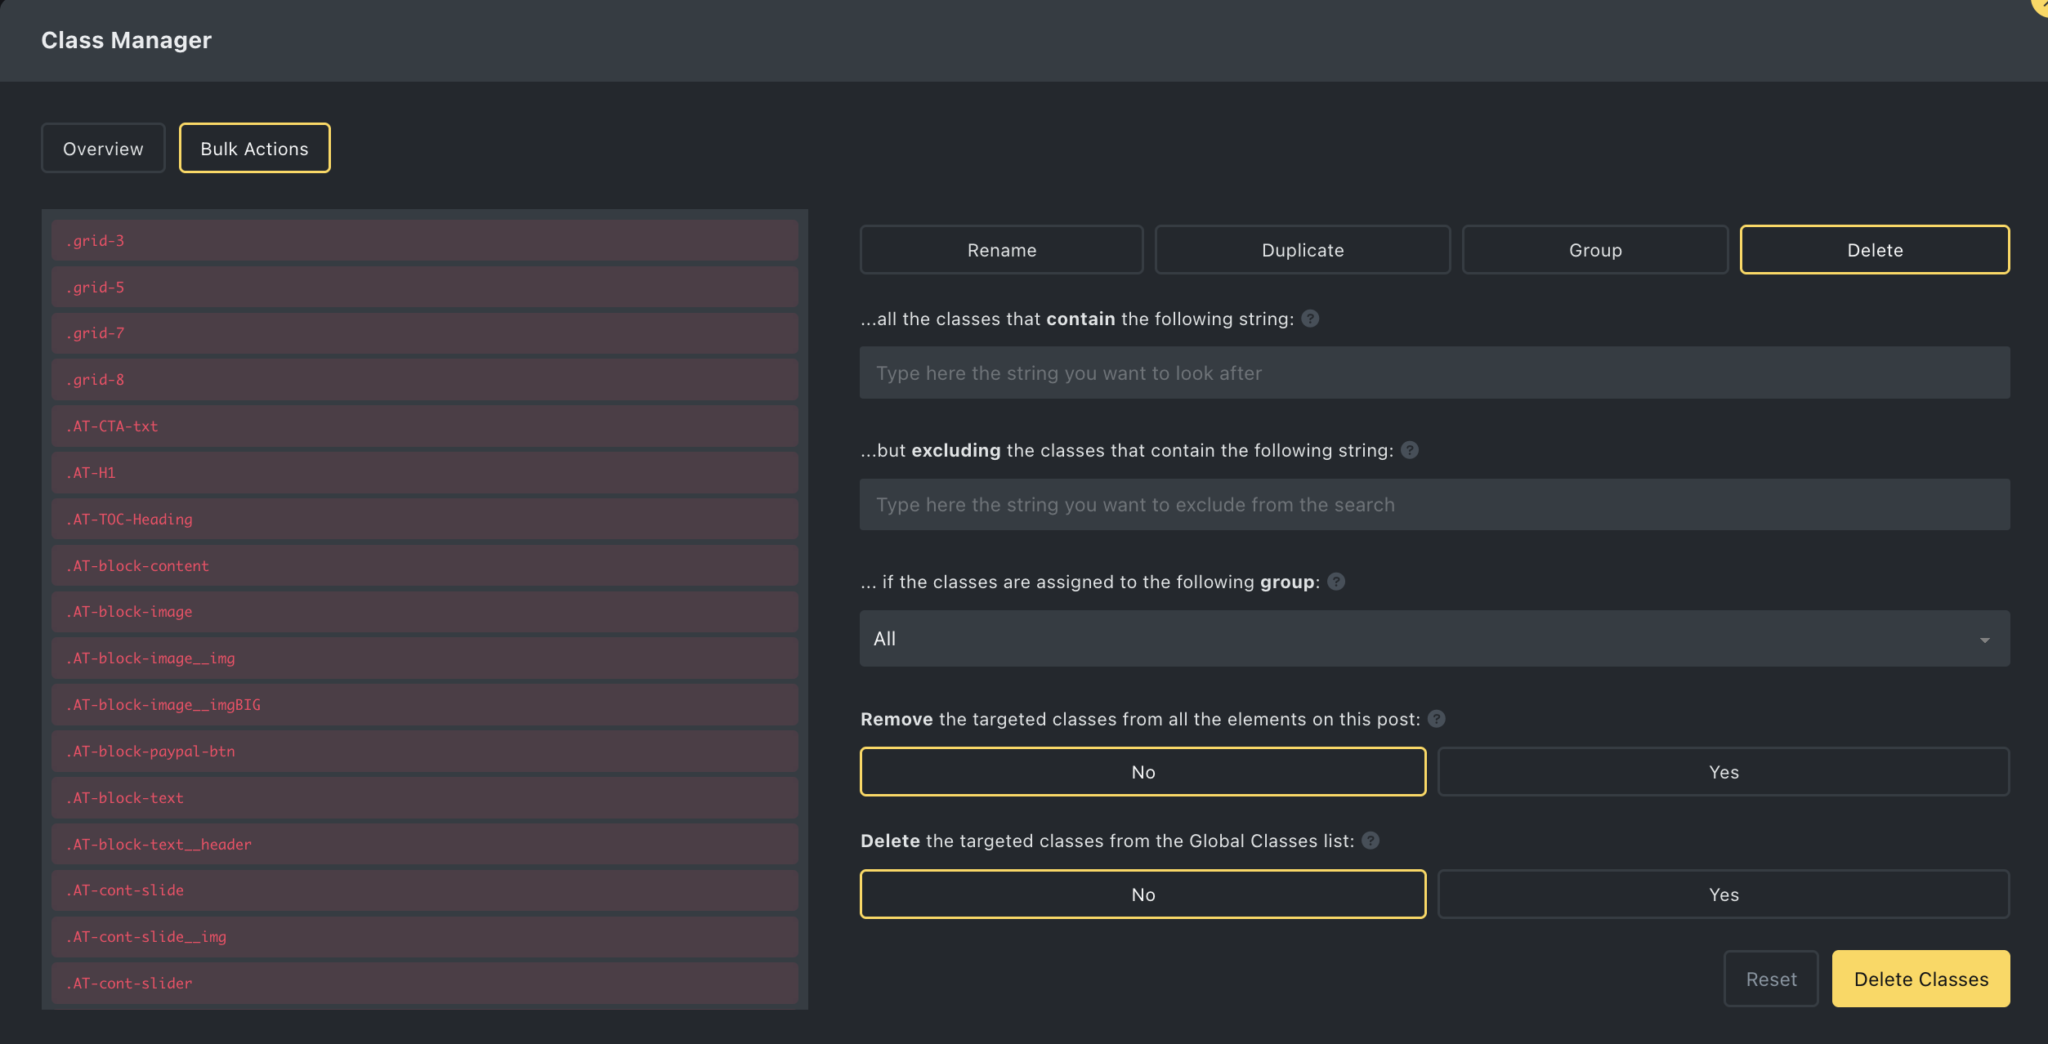
- Delete Classes with or without similarities
And this is what you can do with Rename going from the top row to the bottom row:
Rename: all the classes that contain the following string: [e.g. hero]
(Immediately the list will respond to your typing)
…but excluding the classes that contain the following string: [e.g. btn]
… if the classes are assigned to the following group: [e.g. one of the categories]
Replace the following string inside the class name: [e.g. hero]
…with this new string: [e.g. featured]
You can also “Add the following prefix: …..”
“…and the following suffix:…..”
When “Duplicate” is used AT will automatically add ‘-new‘ to the class name.
At the bottom there are 3 options:
- You can assign the duplicated classes to the same elements,
- You can Remove the old classes from all the elements on this post,
- You can Delete the old classes from the Global Classes list.
Within the “Group” it is possible to quickly group the classes and create a new category, and in the “Delete” tab the two most important choices are:
Remove the targeted classes from all the elements on this post, or
Delete the targeted classes from the Global Classes list.
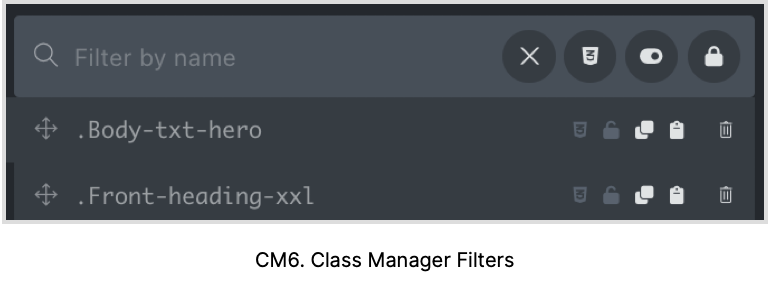


Class Manager - Filters
In the search field, you can start typing the name of the class you are looking for, and AT will offer you a list of classes starting with the chosen letters.
To the right are 4 icons:
X = clear search field![]() Filter classes that contain styles (or not)
Filter classes that contain styles (or not)![]() Filter classes that are active on this page (or not)
Filter classes that are active on this page (or not)![]() Filter classes that are locked (or not)
Filter classes that are locked (or not)
With the first icon following the ‘X’ you can filter classes that contain styles.
When clicked upon it changes color to red and green.
The first click makes the button go red, it will show all classes without styles.
The second click shows a green button, and it will show all classes with styles.


Filter by Active on Page
The second filter (Red) will show any class that is not active and not assigned to any element on this page.
The green button will show any class that is active on this page


Filter by Locked Status
The third icon, Filter by Locked Status, will show all classes that are locked.
And the green button will show all classes that are not locked.
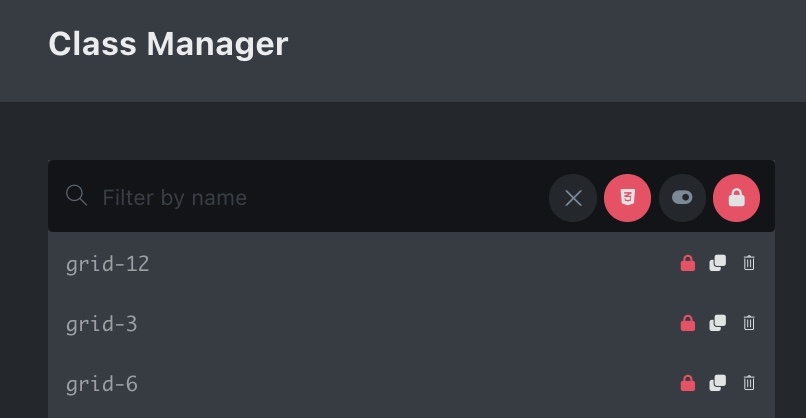
Combination of Filters
Filters can also be used in combination with each other, in this case all classes without styles, and that are locked.
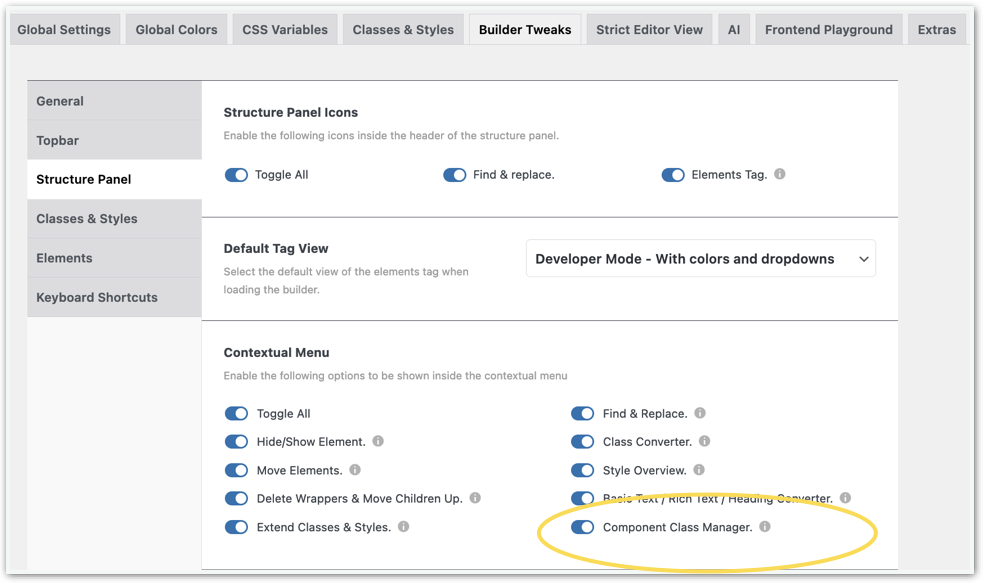
Component Class Manager (Experimental)
The Component Class Manager can be enabled in Builder Tweaks – Structure Panel – Component Class Manager.
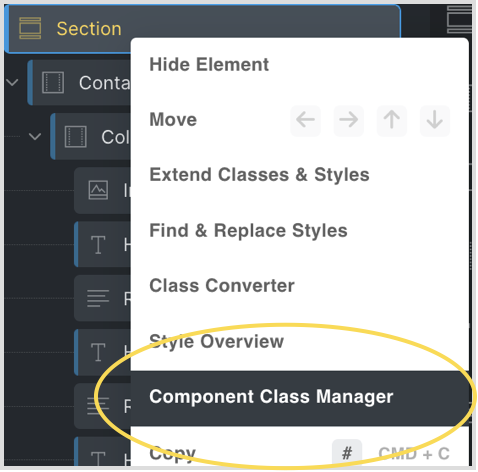
Now you can right-click on any element in the structure panel and we’ll find a new item: Component Class Manager.
When we click on the Component Class Manager a modal opens with the same name and appearance as the Class Manager. However, the big difference with the Class Manager is that it shows only the Classes that are effective in the selected component and its children.
So, when you click for instance on the Section (the root) it will show all Classes that are in use with itself and its children. If you click on a child without a class nothing will show in the list.
We cannot drag and drop Classes because what we see is already filtered. But basically, we can do the same actions as in the Class Manager.
Drag-n-drop Classes
Sometimes, when you add another class to an element, e.g. on a different breakpoint, the class doesn’t work. This is because of the way Bricksbuilder handles classes.
However, if you change the order of the classes then it might work. From AT 1.3 you can drag the classes to change the order.